今天要來聊聊關於ExpandableListView
關於ExpandableListView,當時在找資料時發現資訊量比想像中地少(´・д・`)
雖然還不至於要到非得英文搜尋才可以找到你要的資訊
但是就是...比較少就是了XD
絕大多數有寫的都是簡書或者CSDN等大陸的資料(´・_・`)
而且有的還寫得特別複雜,看了都昏了(但是解釋得算很清楚..
OK廢話就先到這裡,我本身對於這個控件只有一個看法...
其實比起控件本身,真正難的是"該如何設計陣列"(╭ರ_⊙)
沒錯,我這樣講好了
舉例RecycleView或者ListView等,這兩項控件都是單層列表
簡而言之只要懂得操作單層的陣列就好(´・з・)
像是
String[] mString = ["1",''2",'3'",''4",''5"];
這種,或是只要輸出只有單層的,就可以完成單層的控件
但是像ExpandableListView,是屬於雙層(´υ`)
所以在陣列的設計上,必須多加考慮才能達到自己想要的效果
2020/6/6補充
這邊有雙層清單的進階使用方法,歡迎各位參考哦!
碼農日常-『Android studio』ExpandableListView+長按顯示選單視窗ContextMenu
好,廢話到此,上功能與Github
GitHub:
https://github.com/thumbb13555/ExpandableListVIewExample
首先在開始之前,可以找看看Google有沒有提供範例,以及了解基本能用的指令
https://developer.android.com/reference/android/widget/ExpandableListView
https://developer.android.com/reference/android/widget/BaseExpandableListAdapter
好啦...範例貌似沒提供但是有基本Api指令資料
參考看看就好
那麼開始操作
首先請先在onCreate的外面新增一個class

然後紅線下implement methods,加入BaseExpandableListAdapter所繼承過來的方法
public class MainActivity extends AppCompatActivity {
    private static final String TAG = "CommunicationWithBT";
    private MyExpandableListAdapter myExpandableListAdapter;

    @Override
    protected void onCreate(Bundle savedInstanceState) {
        super.onCreate(savedInstanceState);
        setContentView(R.layout.activity_main);

    }


    private class MyExpandableListAdapter extends BaseExpandableListAdapter{
        @Override
        public int getGroupCount() {//父陣列長度
            return 0;
        }

        @Override
        public int getChildrenCount(int groupPosition) {//子陣列長度
            return 0;
        }

        @Override
        public Object getGroup(int groupPosition) {
            return null;
        }

        @Override
        public Object getChild(int groupPosition, int childPosition) {
            return null;
        }

        @Override
        public long getGroupId(int groupPosition) {
            return 0;
        }

        @Override
        public long getChildId(int groupPosition, int childPosition) {
            return 0;
        }

        @Override
        public boolean hasStableIds() {
            return false;
        }

        @Override
        public View getGroupView(int groupPosition, boolean isExpanded
                , View convertView, ViewGroup parent) {//設置父項目的View

            return null;
        }

        @Override
        public View getChildView(int groupPosition, int childPosition, boolean isLastChild, View convertView, ViewGroup parent) {//設置子項目的View

            return null;
        }

        @Override
        public boolean isChildSelectable(int groupPosition, int childPosition) {//設置子項目是否可點擊
            return false;
        }
    }
}
注意紅色部分是自定義的命名
在方法裡面簡單解釋幾個會用到的
getGroupCount()為父陣列長度<-第一層
getChildrenCount()為子陣列長度<-第二層
getGroupId() 回傳groupPosition即可
getChildId() 回傳childPosition即可
getGroupView() 設置父層的View
getChildView() 設置子層的View
isChildSelectable() 設置子項目是否可被點擊
可以發現說在方法內有getGroupView() 跟getChildView()
也因此設置時要先新增兩個額外的View介面去處理
啊...突然想到忘了PO Layout..._(┐「ε:)_
activity_main.xml
expandlistview_child.xml(子層)
expandlistview_item.xml(父層)
接著要做的事情有二
1.製造資料
2.設置ExpandableListView
首先是製造資料
首先在全域變數內宣告以下
public class MainActivity extends AppCompatActivity {private static final String TAG = "CommunicationWithBT";private MyExpandableListAdapter myExpandableListAdapter; private ExpandableListView expandableListView; private HashMap<String, ArrayList> mainArray = new HashMap<>();//父層總陣列 private ArrayList<String> itemName = new ArrayList<>();//父層標題 private ArrayList<HashMap<String,String>> childArray = new ArrayList<>();//子層陣列 @Override protected void onCreate(Bundle savedInstanceState) { super.onCreate(savedInstanceState); setContentView(R.layout.activity_main); setData(); . . }
我是宣告了3+1個陣列拉...當然不一定需要這麼多(紫色部分)
然後在onCreate內新增一副程式setData();
接著在setData()內寫入以下程式
private void setData() {
        for (int i = 0;i<6;i++){//子項目的內容
            HashMap<String,String> childName = new HashMap<>();//子層內容
            childName.put("Child1","項目"+i);
            childName.put("Child2","內容"+i);
            childArray.add(childName);
        }

        for (int i=0;i<4;i++){//父項目的內容
            itemName.add(i,"標題"+i);

            mainArray.put(itemName.get(i),childArray);
        }

        Log.d(TAG, "setData: "+mainArray);

    }
寫到這邊,可以試著先run一次,然後觀察一下logCat內的資訊
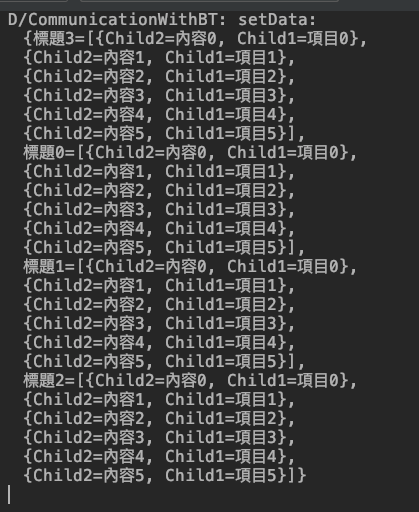
陣列為
父層總陣列<父層標題陣列,子層陣列<String,子層內容>>
這個部分每個人的方法跟不一樣,但是發現結果都差不多(・ω・`)………..
在這裡建議,可以試著用自己的方法完成跟我很像的陣列,這樣以後將可更靈活地運用喔(・ω・)b
接著是設置ExpandableListView的部分
請在onCreate裡面加入
expandableListView = findViewById(R.id.expandAbleListView);
expandableListView.setChildDivider(getResources().getDrawable(R.color.greywhite));//可以先不加入,這是去子層底線用的
myExpandableListAdapter = new MyExpandableListAdapter();
expandableListView.setAdapter(myExpandableListAdapter);
全域宣告的部分長這樣,千萬別漏了
public class MainActivity extends AppCompatActivity { private static final String TAG = "CommunicationWithBT"; private MyExpandableListAdapter myExpandableListAdapter; private ExpandableListView expandableListView; private HashMap<String, ArrayList> mainArray = new HashMap<>();//父層總陣列 private ArrayList<String> itemName = new ArrayList<>();//父層標題 private ArrayList<HashMap<String,String>> childArray = new ArrayList<>();//子層陣列 @Override protected void onCreate(Bundle savedInstanceState) {super.onCreate(savedInstanceState); setContentView(R.layout.activity_main);expandableListView = findViewById(R.id.expandAbleListView); expandableListView.setChildDivider(getResources().getDrawable(R.color.greywhite));//可以先不加入,這是去子層底線用的 myExpandableListAdapter = new MyExpandableListAdapter(); expandableListView.setAdapter(myExpandableListAdapter); }
再來設置MyExpandableListAdapter的內容
請按照以下設定
private class MyExpandableListAdapter extends BaseExpandableListAdapter{
        @Override
        public int getGroupCount() {//父陣列長度
            return mainArray.size();
        }

        @Override
        public int getChildrenCount(int groupPosition) {//子陣列長度
            return childArray.size();
        }

        @Override
        public Object getGroup(int groupPosition) {
            return null;
        }

        @Override
        public Object getChild(int groupPosition, int childPosition) {
            return null;
        }

        @Override
        public long getGroupId(int groupPosition) {
            return groupPosition;
        }

        @Override
        public long getChildId(int groupPosition, int childPosition) {
            return childPosition;
        }

        @Override
        public boolean hasStableIds() {
            return false;
        }

        @Override
        public View getGroupView(int groupPosition, boolean isExpanded
                , View convertView, ViewGroup parent) {//設置父項目的View
            if (convertView == null){
                LayoutInflater inflater = (LayoutInflater) MainActivity.this
                        .getSystemService(Context.LAYOUT_INFLATER_SERVICE);
                convertView = inflater.inflate(R.layout.expandlistview_item,null);
            }
            convertView.setTag(R.layout.expandlistview_item,groupPosition);
            convertView.setTag(R.layout.expandlistview_item,-1);
            TextView textView = convertView.findViewById(R.id.textView_ItemTitle);
            textView.setText(itemName.get(groupPosition));

            return convertView;
        }

        @Override
        public View getChildView(int groupPosition, int childPosition, boolean isLastChild, View convertView, ViewGroup parent) {
            if (convertView == null){//設置子項目的View
                LayoutInflater inflater = (LayoutInflater) MainActivity.this
                        .getSystemService(Context.LAYOUT_INFLATER_SERVICE);
                convertView = inflater.inflate(R.layout.expandlistview_child,null);
            }
            convertView.setTag(R.layout.expandlistview_child,groupPosition);
            convertView.setTag(R.layout.expandlistview_child,-1);
            TextView child1 = convertView.findViewById(R.id.textView_child1);
            TextView child2 = convertView.findViewById(R.id.textView_child2);
            child1.setText(childArray.get(childPosition).get("Child1"));
            child2.setText(childArray.get(childPosition).get("Child2"));
            return convertView;
        }

        @Override
        public boolean isChildSelectable(int groupPosition, int childPosition) {//設置子項目是否可點擊
            return true;
        }
    }
可以瞧見他給的Adapter內,大致就是由groupPosition及childPositiion組成
groupPosition是父層的ID
childPositiion是子層的ID
靈活地運用這兩項就可以完成自己想要的樣子囉~
結論
ExpandableListView不能說它是一個不常用的控件
但是的確比起一些常用元件,他的出現頻率是低了點
ExpandableListView最大的難點我覺得是如何使用各種集合陣列拼出自己想要的樣子
我在實際專案中因為我的資料來源是RoomDataBase
因此還要考慮從Room取出來後應該要有的樣子
還有自己的實際需要
今天的教學就到這
希望對你有幫助(・ωー)~☆


 留言列表
留言列表
