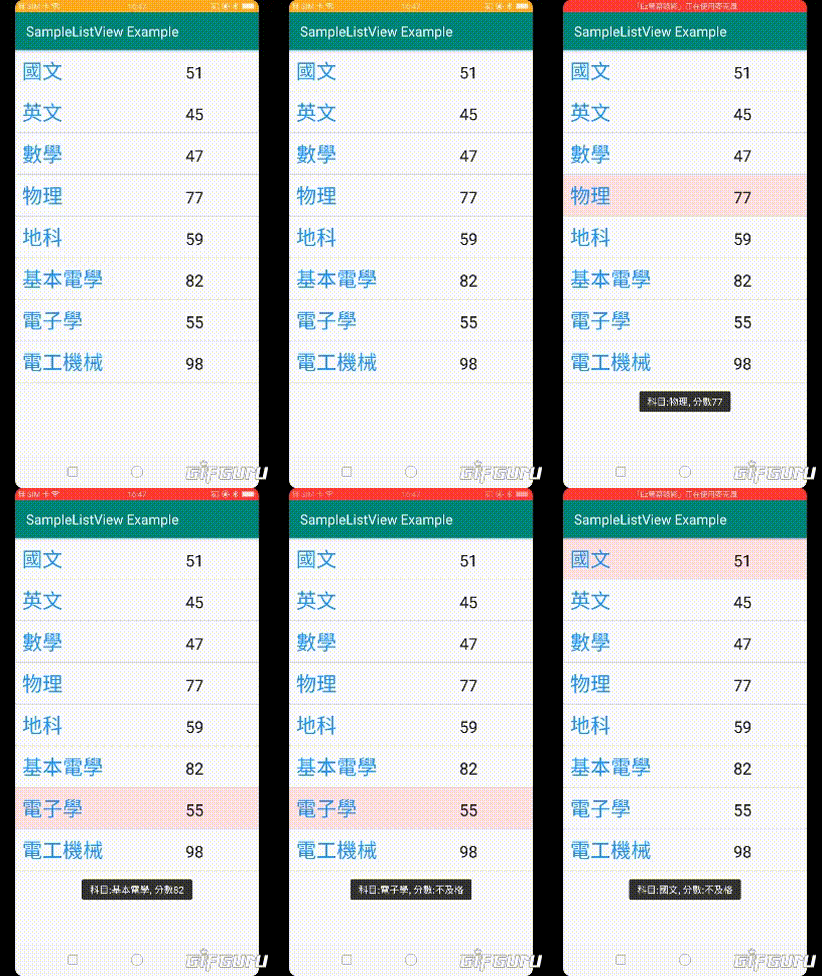
這次的單元要來介紹ListView元件
而這次最後的成品如下

現在的時間是2019年的11月
可能有人覺得奇怪為何在這種年代還在介紹ListView
為何不使用現在一致好評的RecycleView呢?
其實在RecycleView一出來我就使用了
RecycleView雖然超級好用,但是要Coding的內容其實蠻多的
對於僅需要輕量使用的狀況而言,實在是有點殺雞焉用牛刀
但是輕量歸輕量,在今天的範例中還是盡可能深入淺出
當然之後有打算寫RecycleView的文章的~
好啦~一如往常地先上Git以示誠意
https://github.com/thumbb13555/SampleListViewExample
今天要介紹的ListView如上所述算是非常輕量的寫法
多輕量?輕量到20行左右應該就可以搞定
也不用多寫其他類別輔助,也可以做到很多操作
layout的UI介面也可以自行定義
但是缺點是在UI設計上沒辦法用程式控制,會減少很多樂趣
PO一下最近用RecycleView寫出的專案

用RecycleView的話就可以用程式去控制單項目的背景色

也不能說用今天教的程式就做不到
只是....RecycleView來處理真的比較方便
好啦回歸正題

來簡述一下今天要完成的功能
1.標題(科目)是固定的,但是得分是亂數
2.點擊項目後顯示科目及分數
3.如果分數低於60,直接顯示不及格
4.點擊項目後背景色設為櫻花色,並在下次點擊後消失(該功能有方法可用)
在最開始我要先設置全域變數以及建立框架
public class MainActivity extends AppCompatActivity {

    String[] subject = {"國文", "英文", "數學", "物理", "地科", "基本電學", "電子學", "電工機械"};
    ArrayList<String> score = new ArrayList<>();
    ListView listView;
    SimpleAdapter simpleAdapter;

    @Override
    protected void onCreate(Bundle savedInstanceState) {
        super.onCreate(savedInstanceState);
        setContentView(R.layout.activity_main);
        displayListView();
    }
    private void displayListView(){

    }
}
這邊我將兩個陣列分開來寫,第一個陣列是決定科目的陣列
也就是subject的陣列
另一個陣列是分數的陣列,這個陣列會根據科目數量自動增減
講個個人的小小抱怨
我以前在對這些不熟的時候最討厭用兩個陣列顯示的ListView範例
因為在實際案例中,一般至少都會有一組陣列是要能自由增減的
甚至全部都要能自由增減的案例才是主流,也才是應該的
但後來了解是因為大家不想在單一元件介紹中偏離主題,才會這麼做
而且如果使用的話,就牽涉到集合元素之類的問題了
不過我這邊還是選擇讓一個固定陣列與一個自由陣列實現
反正只要有列表元素就肯定要使用集合了,根本逃不掉XD
好啦,接下來的程式都寫在displayListView()方法內
可參考Git的這個檔案喔
以下是內容
 private void displayListView() {

//        ArrayList<String> arraySubject = new ArrayList<>(Arrays.asList(subject));

        listView = findViewById(R.id.listView);
        final ArrayList<HashMap<String, String>> arrayList = new ArrayList<>();

        for (int i = 0; i < subject.length; i++) {
            HashMap<String, String> hashMap = new HashMap<>();
            score.add(String.valueOf(new Random().nextInt(60) + 40));
            hashMap.put("subject", subject[i]);
            hashMap.put("score", score.get(i));
            arrayList.add(hashMap);
        }
        String[] from = {"subject", "score"};
        int[] value = {R.id.textView, R.id.textView2};
        simpleAdapter =
                new SimpleAdapter(this, arrayList, R.layout.custom_layout, from, value);
        listView.setAdapter(simpleAdapter);

        listView.setOnItemClickListener(onItemClickListener);
    }
在註解的部分是將一般字串陣列轉為arrayList陣列的方法
在本案中我不需要
接著宣告一個包含了HashMap的ArrayList
利用HashMap內必須要有索引的特性,製造出一個具有索引的ArrayList
然後再產生亂數分數(score)的部分,根據科目數量決定產生的量
故使用for迴圈處理
for(int i = 0;i<subject,lenght;i++){}
其中subject.lenght方法中會回傳陣列長度,值為int屬性
故它回傳多少數字就是迴圈會跑幾次
接著在裡面若寫入
score.add(String.valueOf(new Random().nextInt(60) + 40));
的話,就能取得跟科目一樣長度的數量了
底線是亂數產生的方法,可自行替換
完成了score陣列後,接著就要把陣列輸入到Array陣列中的HashMap陣列了
因此,在迴圈內宣告一組HashMap
並把值先載入其中
作法為
HashMap<String, String> hashMap = new HashMap<>();
hashMap.put("subject", subject[i]);
hashMap.put("score", score.get(i));
最後記得要加入
arrayList.add(hashMap);
資料才會正確載入喔
最後,在迴圈外可以設置一個Log,檢查一下值正不正確
D/Test: displayListView:
[{subject=國文, score=88}
, {subject=英文, score=64}
, {subject=數學, score=63}
, {subject=物理, score=51}
, {subject=地科, score=91}
, {subject=基本電學, score=46}
, {subject=電子學, score=92}
, {subject=電工機械, score=51}]
外圍的[] 方形括號是ArrayList的部分
而中間的{}大括號是HashMap
這種格式眼熟嗎?其實跟JSON陣列很接近是吧~(當然這不是JSON)
接者就要進入正題了
首先先設置一個字串陣列,這個陣列是取得索引值的
String[] from = {"subject", "score"};
所以要特別注意字不能打錯喔
再來寫一個放入值的陣列,使用int宣告
int[] value = {R.id.textView, R.id.textView2};
這裡的textview1是我另行建立的介面
裡面的textView1與texyView2
此外要設計介面的也從這邊處理喔
再來我們設置Adapter
老實說我到現在還是不夠清楚這是什麼
我都叫他適配器,基本上有關陣列的都是要靠它,很重要的
再來寫下這行
simpleAdapter =
                new SimpleAdapter(this, arrayList, R.layout.custom_layout, from, value);
SimpleAdapter()內要包含五個
1.Context
2.ArrayList
3.Layout
4.索引陣列
5.值陣列
接著讓listView載入Adapter
listView.setAdapter(simpleAdapter);
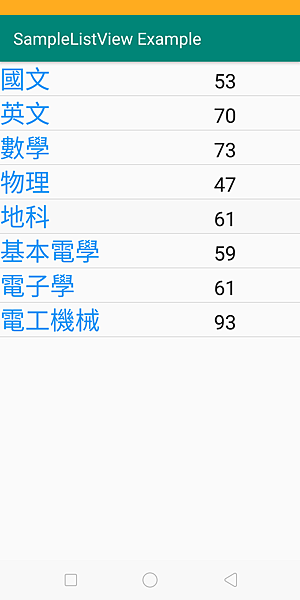
列表就會出現囉~

恩...但是有點太擠了
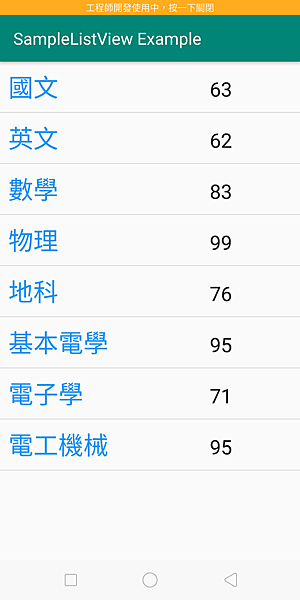
這時候我們進去
調整一下layout_margin
就能得出我們要的結果了

接著就是該設置點擊事件了
請在最底下
 private void displayListView() {

//        ArrayList<String> arraySubject = new ArrayList<>(Arrays.asList(subject));

        listView = findViewById(R.id.listView);
        final ArrayList<HashMap<String, String>> arrayList = new ArrayList<>();

        for (int i = 0; i < subject.length; i++) {
            HashMap<String, String> hashMap = new HashMap<>();
            score.add(String.valueOf(new Random().nextInt(60) + 40));
            hashMap.put("subject", subject[i]);
            hashMap.put("score", score.get(i));
            arrayList.add(hashMap);
        }
        String[] from = {"subject", "score"};
        int[] value = {R.id.textView, R.id.textView2};
        simpleAdapter =
                new SimpleAdapter(this, arrayList, R.layout.custom_layout, from, value);
        listView.setAdapter(simpleAdapter);

        listView.setOnItemClickListener(onItemClickListener);
    }
加入紫紅色的程式
然後再displayListView()外加入點擊事件
private AdapterView.OnItemClickListener onItemClickListener
            = ((parent, view, position, id) -> {

     }
裡面有四個方法
其中這次會使用到的為position的方法
相關其他屬性在這邊,請參考
https://developer.android.com/reference/android/widget/AdapterView.OnItemClickListener
先PO上點擊事件的程式
private AdapterView.OnItemClickListener onItemClickListener
            = ((parent, view, position, id) -> {
                String getName = subject[position];
                String getValue= score.get(position);
                listView.setSelector(R.color.Sakura);
                if (Integer.parseInt(getValue)<60){
                    Toast.makeText(getBaseContext(),
                            "科目:"+getName+", 分數:不及格",Toast.LENGTH_SHORT).show();
                }else{
                    Toast.makeText(getBaseContext(),
                            "科目:"+getName+", 分數"+getValue,Toast.LENGTH_SHORT).show();
                }
    });
其實很簡單,只要
陣列[position]
就可以了
因為我是宣告字串陣列
所以回傳也是字串
我已經把它寫好成getName跟getValue
最後我想要讓點擊下去的背景色變色
這裡就呼叫
listview.setSelector()
方法
()部分在裡面載入顏色資源就好
非常非常方便
加入它就可以完成想要的效果囉!

OK,介紹就到這邊
如果有問題就在留言詢問喔
上述的程式都在這,自行參考吧~
那麼,祝各位學習愉快!


 留言列表
留言列表
